|
|
| Line 20: |
Line 20: |
| | | | |
| | ==Outside== | | ==Outside== |
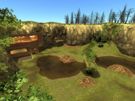
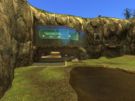
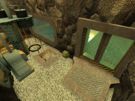
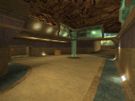
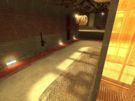
| − | The Outside is a beautiful park that connects the two bases. Filled with trees, rocks and even a little pond in the center, the Outside would be a great place to take a break were it not for a CTF game occurring and all the Snipers. This area is the only way attackers can get to the enemy's base, so they need to be extra careful.
| |
| − |
| |
| − | Attackers need to get out of here ASAP; this area is Sniper Heaven. No matter what exit (Front Door or Respawn) an attacker will use, a Sniper will probably have it covered. Have a defending Sniper cover attackers as they're passing by; a brief Sniper War can distract enemy Snipers long enough so that attackers can safely pass by.
| |
| − |
| |
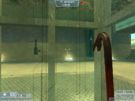
| − | When going to the enemy's base, don't fly into the window! If somebody hits it, they'll explode into meaty giblets. This doesn't happen often, but it's funny seeing an overzealous "pro" concjumper slam into it.
| |
| − |
| |
| − | Defenders should have a Sniper or two out here. They're the only class that can effectively work in this area. Hiding spots are abundant; rocks and trees can be used to hide. The Sniper's shots charged to the max will take out almost anyone in one hit. This can disable an enemy's before they get to the defender's base. Because this is the only area that connects the two bases, Snipers should expect a lot of targets passing through.
| |
| − |
| |
| − | If you see an enemy Sniper, try to take him out, but don't get caught in a Sniper War. Some sneaky attackers will have their Snipers deliberately initiate a Sniper War so that the attackers can pass though the Outside with ease.
| |
| − |
| |
| − | Other classes shouldn't even bother trying to defend this area, with the exception of a defender's flag being out in it.
| |
| | {{Image_Gallery | | {{Image_Gallery |
| | | igimage1=[[Image:ff_aardvark0017.jpg|135px]] | | | igimage1=[[Image:ff_aardvark0017.jpg|135px]] |
| Line 43: |
Line 32: |
| | | | |
| | ==Front Door== | | ==Front Door== |
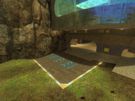
| − | The Front Door is the only entrance to a base. The speed booster in front of the main entrance can help attackers fly through the ramp and get into the Top Main Ramp quickly. A side entrance to the right of the main one is available for those that don't want to make a scene when coming in. The center of the Front Door contains a ramp that leads to the Top Main Ramp, the left side of it contains an entrance to the Basement (hidden behind a pillar) and the left and right sides contain entrances to the Utility Corridors.
| |
| | {{Image_Gallery | | {{Image_Gallery |
| | | igimage1=[[Image:ff_aardvark0031.jpg|135px]] | | | igimage1=[[Image:ff_aardvark0031.jpg|135px]] |
| Line 52: |
Line 40: |
| | | | |
| | ==Utility Corridors== | | ==Utility Corridors== |
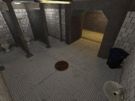
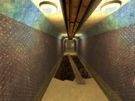
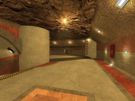
| − | The Utility Corridors connect the two sides of the Front Door and the Generator Room. The road that leads to the Generator Room has pit slightly covered by a plank. If you fall into the pit, you'll instantly die. Also, the door that leads to the Generator Room will only be open if the switch in the Room has turned off. The Utility Corridors also have a bathroom in case your character needs to take a bathroom break.
| |
| − |
| |
| − | Attackers can use the Utility Corridors to get to the Basement entrance without having the defenders on the ramp notice him. They should enter via the side entrance and use the Utility Corridor entrance to get to the Basement entrance that's in front of the other entrance.
| |
| − |
| |
| − | Defenders should have someone posted near the Corridors to let his team know if an attacker is using the Corridors to bypass the defense at the ramp. That way, the defenders can have the Basement exit covered for when the attacker comes out. Demomen can use the Corridors to hide while waiting for an enemy to pass by a Pipe Trap.
| |
| − |
| |
| | {{Image_Gallery | | {{Image_Gallery |
| | | igimage1=[[Image:ff_aardvark0034.jpg|135px]] | | | igimage1=[[Image:ff_aardvark0034.jpg|135px]] |
| Line 66: |
Line 48: |
| | | | |
| | ==Generator Room== | | ==Generator Room== |
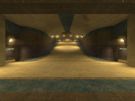
| − | The Generator Room contains the switch that deactivates the lasers blocking the Lift-Side Hallway. This room also leads to the Respawn-Side Hallway. An exit from the Utility Corridors is also available, but only if the Generator switch is down.
| |
| − |
| |
| − | Attackers should try to touch the switch if the defenders have a strong showing in the Respawn-Side Hallway. Defenders that do so usually have very little to no defense in the Lift-side Hallway, which makes it easy for an attacker to fly through it and grab the flag from under their nose.
| |
| − |
| |
| − | Defenders should have a HWGuy, Soldier, Pipe Trap or Sentry if they're not getting pounded by the attackers. If defenders do put up a defense, they should have it on the ramp overlooking the Top Main Ramp. This allows the defender to cover the Generator Room and the Top Main Ramp. If the Generator Room needs to be defended, the defenders should allocate a defender to the Life-side Hallway, just in case the switch is hit.
| |
| | {{Image_Gallery | | {{Image_Gallery |
| | | igimage1=[[Image:ff_aardvark0025.jpg|135px]] | | | igimage1=[[Image:ff_aardvark0025.jpg|135px]] |
| Line 79: |
Line 56: |
| | | | |
| | ==Top Main Ramp== | | ==Top Main Ramp== |
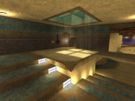
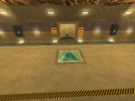
| − | The Top Main Ramp connects the Front Door to the two halls leading to the Flag Room. It's tightness makes it easy for defenders to set up shop nearly-anywhere. The Cap Point is the glass-covered team logo in the center of the room.
| |
| − |
| |
| − | Attackers should either get past it ASAP or bypass it with the Basement. Bypassing is recommended, as even if an attacker gets past the defenders in here, the halls will probably have some defense themselves. However, this is the only path to the Generator Room, so if the switch hasn't been touched yet, there should be a focus to get get into the Generator Room and touch it, so that the other attackers can go through the freshly-opened Lift-Side Hallway before the defenders set up shop.
| |
| − |
| |
| − | Defenders should have two to three defenders here. The catwalk connecting the Utility Corridors and the Generator Room is a great place to put a Sentry, as it is in a high spot and covers two rooms at once. The Boxes laying around can be used as hiding spots for just about anything. Pyros work great here, as they'll always manage to touch someone with at least their [[Flamethrower]]. Level 2 or higher [[On Fire]] can cause a lot of damage while the enemy runs to the Flag Room.
| |
| | {{Image_Gallery | | {{Image_Gallery |
| | | igimage1=[[Image:ff_aardvark0022.jpg|135px]] | | | igimage1=[[Image:ff_aardvark0022.jpg|135px]] |
| Line 94: |
Line 66: |
| | | | |
| | ==Respawn-side hallway== | | ==Respawn-side hallway== |
| − | The Respawn-side Hallway is one of the halls that connect the Top Main Ramp with the Flag Room. It connects with the Generator Room (from the top), the Respawn room (in the left-center) and the Flag Room (at it's end).
| |
| − |
| |
| − | Attackers will be using this hall as the primary passage to the Flag Room, because it has no strings attached, such as lasers blocking the way. However, this means that there'll be a lot of defenders in the hall. Attackers should have their anti-Sentry weapons out and ready to use them on a moment's notice. Attackers should focus on opening up or going through the Lift-side Hallway so that they can avoid the defenders here. They should also bwe aware that enemies fresh from the Respawn room might come in and open fire, no matter if they're an attacker or a defender.
| |
| − |
| |
| − | Defenders should place two to three defenders here at the start. Since attackers will only be using this area at the start, having most of the defenders clustered here can quickly eliminate any attackers coming through. Once either the lasers are down or a defender in the Flag Room notices somebody coming in from the Lift-side Hallway, defenders should focus less on this area, with one person posted here. Defenders should also remember that they can restock in the Respawn room at any time.
| |
| | {{Image_Gallery | | {{Image_Gallery |
| | | igimage1=[[Image:ff_aardvark0026.jpg|135px]] | | | igimage1=[[Image:ff_aardvark0026.jpg|135px]] |
| Line 105: |
Line 72: |
| | | | |
| | ==Flag Room== | | ==Flag Room== |
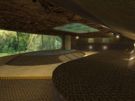
| − | The Flag Room is where the flag is. It has a big window allowing bored defenders to take a look outside and see what's going on outside, along with the occasional [[Scout]] or [[Medic]] slamming into the window. Ammo backpacks are provided for Engineers and the wounded.
| |
| − |
| |
| − | Attackers should be ready to take out Sentries. There's usually at least one in here, so an attacker should take a quick peek, then report where it is and then start attacking it. Once the sentry(ies) are down, they should try to trick the Demoman into blowing up his Pipe Trap. If they don't have enough time to do so, they should grab the flag as fast as they can so that the Pipe Trap detonation goes off after they've ran out of the Trap's radius.
| |
| − |
| |
| − | Defenders should have at least one sentry placed here at all times. The best location for them are directly across from the flag on the raised floor and the small, upper cubbyhole that's near the Lift-side Hallway. Demomen should have a Pipe Trap set near the flag. Other defenders, such as HWGuys and Soldiers, should be in front of the exits or in the actual room, ready to attack any enemy that comes by.
| |
| | {{Image_Gallery | | {{Image_Gallery |
| | | igimage1=[[Image:ff_aardvark0021.jpg|135px]] | | | igimage1=[[Image:ff_aardvark0021.jpg|135px]] |
| Line 116: |
Line 78: |
| | | | |
| | ==Lift-Side Hallway== | | ==Lift-Side Hallway== |
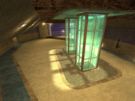
| − | The Lift-Side Hallway can be accessed from the Top Main Ramp (it's left side) or the Basement. Lasers block the entrance from the Top Main Ramp, so the switch in the Generator Room must be turned off before using that entrance. Enemies will be gibbed by the lasers, but can walk through it with ease. In addition, enemies that touch the switch in the Basement will end up in the glass pillars in this room. The switch on the left wall, when pressed, will cause a deadly gas to fill the pillar, killing whoever is trapped within a matter of moments.
| |
| − |
| |
| − | Attackers can use it as an alternate way to the Flag Room. Defenders tend to not reinforce this area, so attackers can usually go through this area with ease. If an attacker is coming through via the Basement, he can get a jump on Sentries in the Flag Room that he can see. Just fire at it using an anti-sentry weapon, then retreat back into the cave before anybody notices the attacker.
| |
| − |
| |
| − | Defenders should have a Sentry, HWGuy or Demoman defending this area. Many defenders forget to reinforce this area, making it easy for enemies coming in so fly past and grab the flag. Even one HWguy can take out most of the enemies that pour in. Be sure to shoot everything that comes in via the Basement entrance; Spies like to use it to sneak into the enemy's base.
| |
| − |
| |
| − | If the lasers are down, there should be a small group of HWGuys, Soldiers or Sentries covering both of the entrances. It's very easy for an enemy to fly through this hall (especially with a Conc or Pyro Jump), so there should be a few defenders. Even after the lasers are down, some sneaky attackers will use the Basement exit so that they don't set off the defenders in the Top Main Ramp. Don't neglect the Respawn-side Hallway or the Flag Room; attackers will note how little defense is in the other hall and will use it.
| |
| − |
| |
| − | Also, if an attacker appears in one of the glass pillars, don't forget to gas him before he commits suicide! It's very satisfying gassing idiots.
| |
| | {{Image_Gallery | | {{Image_Gallery |
| | | igimage1=[[Image:ff_aardvark0037.jpg|135px]] | | | igimage1=[[Image:ff_aardvark0037.jpg|135px]] |
| Line 137: |
Line 90: |
| | | | |
| | ==Basement== | | ==Basement== |
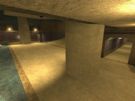
| − | The Basement can be accessed from the left side of the Front Door via a water passage. Once inside, you'll see that the "Basement" is really 2fort's basement! Abandoned after the death of TFC, 2fort was left to rot, until Aardvark was built on it's ruins, with the old basement integrated into the new bases. Inside the old Flag Room are newspaper clippings detailing the creation of Aardvark and a switch. If you touch it, you'll be teleported to the glass pillars in the Lift-Side Hallway. The only way to get out is by killing yourself or letting the enemy gas you to death. Just across from the entrance is the exit, which leads to the Lift-Side Hallway, past the lasers.
| |
| − |
| |
| − | Attackers can use it to bypass the heavy defense that's on the ramp. Just don't touch the switch in the old flag room!
| |
| − |
| |
| − | Defenders shouldn't worry about defending this area. The sentries and other defenders placed in and near the Lift-Side Hallway will take out anybody coming in via the Basement.
| |
| | {{Image_Gallery | | {{Image_Gallery |
| | | igimage1=[[Image:ff_aardvark0028.jpg|135px]] | | | igimage1=[[Image:ff_aardvark0028.jpg|135px]] |
