|
|
| Line 9: |
Line 9: |
| | | | |
| | ==Respawn== | | ==Respawn== |
| | + | This is where you'll respawn. There are two ammo backpacks side-by-side and an isolated grenade backpack in each respawn room. |
| | {{Image_Gallery | | {{Image_Gallery |
| | | igimage1=[[Image:ff_shutdown20010.jpg|135px]] | | | igimage1=[[Image:ff_shutdown20010.jpg|135px]] |
| − | | igcaption1=The arena. | + | | igcaption1=Respawn Room 1, in the Top of the Ramp. |
| | + | | igimage2=[[Image:ff_shutdown20010.jpg|135px]] |
| | + | | igcaption2=Respawn Room 2, in the Ramp Room. |
| | }} | | }} |
| | | | |
Revision as of 13:02, 7 March 2008
The WIP page is below this.
 |
This is a stub map page and needs proper content. In the meantime the map loading screen is being displayed as a placeholder. |
Description
Shutdown2 takes place in a large pit in a hilly area. Red and Blue have rewired the power generator from a nearby town to power laser fields protecting their flags.
The key twist in this map is that there are lasers blocking the entrance to the Flag Room. If you touch the lasers, you will explode. To disable them, you must find and disable the power generator located nearby. Once it's down, you have a minute to grab the flag and get it out of the flag room. This encourages teammates to work together (for once!).
Locations
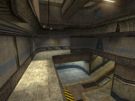
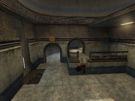
Respawn
This is where you'll respawn. There are two ammo backpacks side-by-side and an isolated grenade backpack in each respawn room.
|
|

|
| Respawn Room 1, in the Top of the Ramp.
|
|
|
|
|
|
|
| Respawn Room 2, in the Ramp Room.
|
|
|
|
|
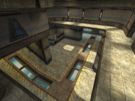
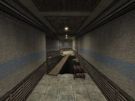
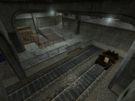
Ramp Room
|
|
|
| Overview of the Ramp Room.
|
|
|
|
|
|
| The Upper Ramp Room.
|
|
|
|
|
|
| The resupply/respawn room on the right side of the lower Ramp Room.
|
|
|
|
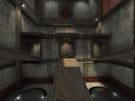
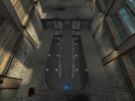
Ramp
|
|

|
| The arena.
|
|
|
|
|
|
Top of the Ramp
|
|
|
|
| Overview of the Top of the Ramp.
|
|
|
|
|
|
Security
|
|
|
| This switch, when touched, will deactivate the lasers for 60 seconds.
|
|
|
|
|
|
| The entrance (left) and exit (right) to the generator room.
|
|
|
|
|
Battlements
The Battlements is where most of the Sniping occurs. Between the two sniping spots is the Cap Point for flag holders. Next to the Cap Point is a ladder that leads to the upper Yard.
Attackers can slip in through the upper Yard. Since Snipers probably won't be expecing an attacker to come through, it'll be easy to take one out. However, if a Sniper is killed, he and his buddies will be much more alert and might notice another attacker if he comes down.
Defenders can use this spot as a good sniping nest. Snipers can pick off anybody coming from the enemy's front door or the upper Yard with ease. Other classes shouldn't worry about defending this location; a Sniper Rifle shot followed by a burst from the Auto Rifle (when they get close) will take out most attackers with ease.
|
|
|
| The Capture Point is hidden between the two sniper posts.
|
|
|
|
|
|
Plank
|
|
|
| Don't fall down!
|
|
|
|
|
|
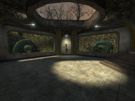
Flag Room
|
|
|
| Overview of the Flag Room.
|
|
|
|
|
|
| Shot of the flagroom from the roof.
|
|
|
|
|

|
| Shot from the top of the flag room.
|
|
|
|
|

|
| What happens when you try to run through the lasers.
|
|
|
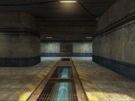
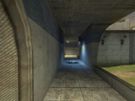
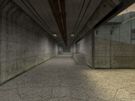
Train Tunnel
The Train Tunnel is a long underground passage that connects the Red and Blue bases. The start of each path has four medikits in the area where the boxes are, in addition to a small ralicart for those that need to get to the enemy base quickly. The medikits are very useful for attackers and defenders. The actual railway doesn't have a lot to offer, but can be conced by with ease.
Attackers should use this path to get to the enemy's base if there's too much enemy traffic and/or Snipers in the Yard. This is also an ideal passage for Spies to use, as very little people travel through here in the first place.
Defenders should have someone periodicially check in and see if there are any incoming enemies. If there are, he should inform his teammates then attack the enemies and hoard as many medikits as he can. The less an enemy can heal up the less chance he has to survive inside the base.
|
|
|
| Behind the boxes is a cache of medikits.
|
|
|
|
|

|
| People usually don't go this way, so it's usually empty.
|
|
|
|
|
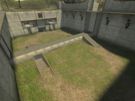
Yard
|
|
|
| Overview of the yard. Notice the pathway that's near the top of it.
|
|
|
|
|

|
| The base.
|
|
|
|
|
Bunker
|
|
|
| The inner bunker. Not a lot goes on here.
|
|
|
|
|
|


