Difference between revisions of "Map:ff shutdown2"
(→Plank) |
|||
| (16 intermediate revisions by the same user not shown) | |||
| Line 1: | Line 1: | ||
| − | |||
| − | |||
=Description= | =Description= | ||
| − | Shutdown2 takes place in a large pit in a hilly area. Red and Blue have rewired the power generator from a nearby town to power laser fields protecting their flags. | + | Shutdown2 is a CTF map that takes place in a large pit in a hilly area. Red and Blue have rewired the power generator from a nearby town to power laser fields protecting their flags. |
The key twist in this map is that there are lasers blocking the entrance to the Flag Room. If you touch the lasers, you will explode. To disable them, you must find and disable the power generator located nearby. Once it's down, you have a minute to grab the flag and get it out of the flag room. This encourages teammates to work together (for once!). | The key twist in this map is that there are lasers blocking the entrance to the Flag Room. If you touch the lasers, you will explode. To disable them, you must find and disable the power generator located nearby. Once it's down, you have a minute to grab the flag and get it out of the flag room. This encourages teammates to work together (for once!). | ||
| Line 9: | Line 7: | ||
==Respawn== | ==Respawn== | ||
| − | This is where you'll respawn. There are two ammo backpacks side-by-side and an isolated grenade backpack in each respawn room. | + | This is where you'll respawn. There are two ammo backpacks side-by-side and an isolated grenade backpack in each respawn room. The ammo packpacks contain 150 Nails, 50 Cells, 200 Shells, 25 Rockets and full health and armour. The grenade bags contain four grenades of each type. |
| + | |||
| + | |||
{{Image_Gallery | {{Image_Gallery | ||
| igimage1=[[Image:ff_shutdown20010.jpg|135px]] | | igimage1=[[Image:ff_shutdown20010.jpg|135px]] | ||
| Line 25: | Line 25: | ||
| igimage3=[[Image:ff_shutdown20027.jpg|135px]] | | igimage3=[[Image:ff_shutdown20027.jpg|135px]] | ||
| igcaption3=The resupply/respawn room on the right side of the lower Ramp Room. | | igcaption3=The resupply/respawn room on the right side of the lower Ramp Room. | ||
| − | |||
| − | |||
| − | |||
| − | |||
| − | |||
| − | |||
}} | }} | ||
| Line 37: | Line 31: | ||
| igimage1=[[Image:ff_shutdown20010.jpg|135px]] | | igimage1=[[Image:ff_shutdown20010.jpg|135px]] | ||
| igcaption1=Overview of the Top of the Ramp. | | igcaption1=Overview of the Top of the Ramp. | ||
| + | | igimage2=[[Image:ff_shutdown20012.jpg|135px]] | ||
| + | | igcaption2=Fork that leads to the Flag Room. | ||
| + | | igimage3=[[Image:ff_shutdown20011.jpg|135px]] | ||
| + | | igcaption3=The elevator. | ||
}} | }} | ||
| Line 44: | Line 42: | ||
| igcaption1=This switch, when touched, will deactivate the lasers for 60 seconds. | | igcaption1=This switch, when touched, will deactivate the lasers for 60 seconds. | ||
| igimage2=[[Image:ff_shutdown20016.jpg|135px]] | | igimage2=[[Image:ff_shutdown20016.jpg|135px]] | ||
| − | | igcaption2=The | + | | igcaption2=The entrances to the generator room. |
}} | }} | ||
==Battlements== | ==Battlements== | ||
| − | |||
| − | |||
| − | |||
| − | |||
| − | |||
{{Image_Gallery | {{Image_Gallery | ||
| igimage1=[[Image:ff_shutdown20022.jpg|135px]] | | igimage1=[[Image:ff_shutdown20022.jpg|135px]] | ||
| Line 59: | Line 52: | ||
==Plank== | ==Plank== | ||
| − | |||
| − | |||
| − | |||
| − | |||
| − | |||
{{Image_Gallery | {{Image_Gallery | ||
| igimage1=[[Image:ff_shutdown20014.jpg|135px]] | | igimage1=[[Image:ff_shutdown20014.jpg|135px]] | ||
| Line 71: | Line 59: | ||
==Flag Room== | ==Flag Room== | ||
{{Image_Gallery | {{Image_Gallery | ||
| − | | igimage1=[[Image: | + | | igimage1=[[Image:ff_shutdown20004.jpg|135px]] |
| igcaption1=Overview of the Flag Room. | | igcaption1=Overview of the Flag Room. | ||
| igimage2=[[Image:ff_shutdown20023.jpg|135px]] | | igimage2=[[Image:ff_shutdown20023.jpg|135px]] | ||
| Line 82: | Line 70: | ||
==Train Tunnel== | ==Train Tunnel== | ||
| − | |||
| − | |||
| − | |||
| − | |||
| − | |||
{{Image_Gallery | {{Image_Gallery | ||
| igimage1=[[Image:ff_shutdown20008.jpg|135px]] | | igimage1=[[Image:ff_shutdown20008.jpg|135px]] | ||
| Line 105: | Line 88: | ||
==Bunker== | ==Bunker== | ||
| − | |||
| − | |||
| − | |||
| − | |||
| − | |||
{{Image_Gallery | {{Image_Gallery | ||
| igimage1=[[Image:ff_shutdown20001.jpg|135px]] | | igimage1=[[Image:ff_shutdown20001.jpg|135px]] | ||
| Line 116: | Line 94: | ||
{{Navigation Map Guides}} | {{Navigation Map Guides}} | ||
| + | {{Rating|4}} | ||
Latest revision as of 10:26, 29 March 2009
Description
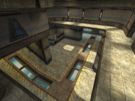
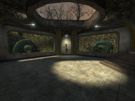
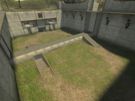
Shutdown2 is a CTF map that takes place in a large pit in a hilly area. Red and Blue have rewired the power generator from a nearby town to power laser fields protecting their flags.
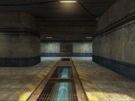
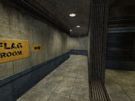
The key twist in this map is that there are lasers blocking the entrance to the Flag Room. If you touch the lasers, you will explode. To disable them, you must find and disable the power generator located nearby. Once it's down, you have a minute to grab the flag and get it out of the flag room. This encourages teammates to work together (for once!).
Locations
Respawn
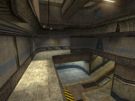
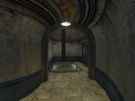
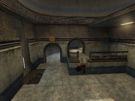
This is where you'll respawn. There are two ammo backpacks side-by-side and an isolated grenade backpack in each respawn room. The ammo packpacks contain 150 Nails, 50 Cells, 200 Shells, 25 Rockets and full health and armour. The grenade bags contain four grenades of each type.
|
|
|
|
Ramp Room
|
|
|
|
Top of the Ramp
|
|
|
|
Security
|
|
|
|
Battlements
|
|
|
|
Plank
|
|
|
|
Flag Room
|
|
|
|
Train Tunnel
|
|
|
|
Yard
|
|
|
|
Bunker
|
|
|
|
|


