Difference between revisions of "Map:ff well"
| (27 intermediate revisions by the same user not shown) | |||
| Line 1: | Line 1: | ||
| − | |||
| − | |||
| − | |||
=Description= | =Description= | ||
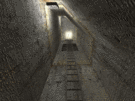
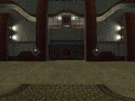
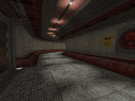
Ah, yes. The classic map, a map that defines Team Fortress: Well. Well is a symmetrical capture-the-flag level that consists of three main parts: the Blue base, the Red base, and the very large yard in between the bases. The bases can be entered through a water route (with a little help from Mister [[Detpack]]), or you can bull-rush the front door. Other features include a roof and battlements for sniping, a middle bunker for ducking down in, and a roomy flag room, great for [[Sentry Gun|sentry guns]]. | Ah, yes. The classic map, a map that defines Team Fortress: Well. Well is a symmetrical capture-the-flag level that consists of three main parts: the Blue base, the Red base, and the very large yard in between the bases. The bases can be entered through a water route (with a little help from Mister [[Detpack]]), or you can bull-rush the front door. Other features include a roof and battlements for sniping, a middle bunker for ducking down in, and a roomy flag room, great for [[Sentry Gun|sentry guns]]. | ||
=Locations= | =Locations= | ||
| − | == | + | ==Respawn== |
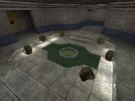
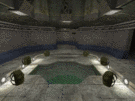
This is where you respawn. Both respawns have two routes; one leads to the base and the other leads to a platform for [[Concjumping|concjumping]] to the enemy's base. However, one of them has a hole that leads to the Flag Room Water Route. The backpacks in this room contain 200 Cells, 25 Rockets, 200 Shells, 200 Nails, 100 Health and 200 Armour. There is, of course, the obligatory spawnguarding indestructible turret to keep your spawn area free of [[Pyro|Pyros]] or perhaps the occasional [[Grenade:EMP|EMP]]-happy [[Engineer]]. | This is where you respawn. Both respawns have two routes; one leads to the base and the other leads to a platform for [[Concjumping|concjumping]] to the enemy's base. However, one of them has a hole that leads to the Flag Room Water Route. The backpacks in this room contain 200 Cells, 25 Rockets, 200 Shells, 200 Nails, 100 Health and 200 Armour. There is, of course, the obligatory spawnguarding indestructible turret to keep your spawn area free of [[Pyro|Pyros]] or perhaps the occasional [[Grenade:EMP|EMP]]-happy [[Engineer]]. | ||
| Line 20: | Line 17: | ||
}} | }} | ||
| − | == | + | ==Ramp Room== |
| − | |||
{{Image_Gallery | {{Image_Gallery | ||
| igimage1=[[Image:ff_well0049.gif|135px]] | | igimage1=[[Image:ff_well0049.gif|135px]] | ||
| Line 30: | Line 26: | ||
}} | }} | ||
| − | == | + | ==Battlements== |
| − | |||
| − | |||
{{Image_Gallery | {{Image_Gallery | ||
| igimage1=[[Image:ff_well0050.gif|135px]] | | igimage1=[[Image:ff_well0050.gif|135px]] | ||
| Line 40: | Line 34: | ||
}} | }} | ||
| − | == | + | ==Loft== |
| − | + | The backpacks in this room contain 60 Cells, 60 Rockets, 60 Shells, 60 Nails, 1 Regular and Special grenade, 20 Health and 15 Armour. | |
{{Image_Gallery | {{Image_Gallery | ||
| igimage1=[[Image:ff_well0053.gif|135px]] | | igimage1=[[Image:ff_well0053.gif|135px]] | ||
| Line 48: | Line 42: | ||
}} | }} | ||
| − | == | + | ==Flag Room Catwalks== |
| − | |||
| − | |||
{{Image_Gallery | {{Image_Gallery | ||
| igimage1=[[Image:ff_well0054.gif|135px]] | | igimage1=[[Image:ff_well0054.gif|135px]] | ||
| Line 56: | Line 48: | ||
}} | }} | ||
| − | == | + | ==Flag Room== |
| − | |||
| − | |||
{{Image_Gallery | {{Image_Gallery | ||
| igimage1=[[Image:ff_well0056.gif|135px]] | | igimage1=[[Image:ff_well0056.gif|135px]] | ||
| Line 64: | Line 54: | ||
}} | }} | ||
| − | == | + | ==Lower Flag Room== |
| − | |||
| − | |||
{{Image_Gallery | {{Image_Gallery | ||
| igimage1=[[Image:ff_well0063.gif|135px]] | | igimage1=[[Image:ff_well0063.gif|135px]] | ||
| igcaption1=Overview of the lower Flag Room. | | igcaption1=Overview of the lower Flag Room. | ||
| igimage2=[[Image:ff_push0074.gif|135px]] | | igimage2=[[Image:ff_push0074.gif|135px]] | ||
| − | | igcaption2= | + | | igcaption2=The capture point. |
}} | }} | ||
==Flag Room Water== | ==Flag Room Water== | ||
| − | |||
{{Image_Gallery | {{Image_Gallery | ||
| igimage1=[[Image:ff_well0057.gif|135px]] | | igimage1=[[Image:ff_well0057.gif|135px]] | ||
| Line 82: | Line 69: | ||
==Water Route== | ==Water Route== | ||
| − | |||
| − | |||
{{Image_Gallery | {{Image_Gallery | ||
| igimage1=[[Image:ff_well0074.gif|135px]] | | igimage1=[[Image:ff_well0074.gif|135px]] | ||
| Line 91: | Line 76: | ||
}} | }} | ||
| − | == | + | ==Bunker== |
| − | |||
| − | |||
| − | |||
| − | |||
| − | |||
| − | |||
| − | |||
| − | |||
| − | |||
| − | |||
| − | |||
| − | |||
| − | |||
| − | |||
{{Image_Gallery | {{Image_Gallery | ||
| igimage1=[[Image:ff_well0069.gif|135px]] | | igimage1=[[Image:ff_well0069.gif|135px]] | ||
| Line 115: | Line 86: | ||
| igcaption3=Shot of the Bunker from the water pools. | | igcaption3=Shot of the Bunker from the water pools. | ||
| igimage4=[[Image:ff_well0070.gif|135px]] | | igimage4=[[Image:ff_well0070.gif|135px]] | ||
| − | | igcaption4= | + | | igcaption4= |
}} | }} | ||
| − | == | + | ==Yard== |
| − | |||
| − | |||
{{Image_Gallery | {{Image_Gallery | ||
| igimage1=[[Image:ff_well0040.gif|135px]] | | igimage1=[[Image:ff_well0040.gif|135px]] | ||
| − | | igcaption1= | + | | igcaption1=Overview of the Yard. |
| igimage2=[[Image:ff_well0044.gif|135px]] | | igimage2=[[Image:ff_well0044.gif|135px]] | ||
| − | | igcaption2=The | + | | igcaption2=The roof of your base is a great place to snipe. |
| igimage3=[[Image:ff_well0045.gif|135px]] | | igimage3=[[Image:ff_well0045.gif|135px]] | ||
| − | | igcaption3= | + | | igcaption3=Another shot of the roof. |
| igimage4=[[Image:ff_well0043.gif|135px]] | | igimage4=[[Image:ff_well0043.gif|135px]] | ||
| − | | igcaption4=The | + | | igcaption4=The ladder leading up to the roof. |
}} | }} | ||
| − | == | + | ==Front Door== |
| − | |||
| − | |||
| − | |||
{{Image_Gallery | {{Image_Gallery | ||
| igimage1=[[Image:ff_well0046.gif|135px]] | | igimage1=[[Image:ff_well0046.gif|135px]] | ||
| − | | igcaption1=The | + | | igcaption1=The Front Door. |
| igimage2=[[Image:ff_well0048.gif|135px]] | | igimage2=[[Image:ff_well0048.gif|135px]] | ||
| igcaption2=Just past the Front Door. | | igcaption2=Just past the Front Door. | ||
}} | }} | ||
{{Navigation Map Guides}} | {{Navigation Map Guides}} | ||
| + | |||
| + | {{Rating|3}} | ||
Latest revision as of 10:29, 29 March 2009
Description
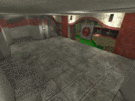
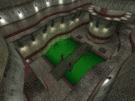
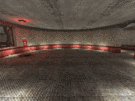
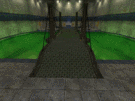
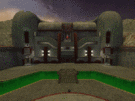
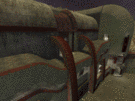
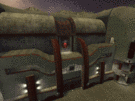
Ah, yes. The classic map, a map that defines Team Fortress: Well. Well is a symmetrical capture-the-flag level that consists of three main parts: the Blue base, the Red base, and the very large yard in between the bases. The bases can be entered through a water route (with a little help from Mister Detpack), or you can bull-rush the front door. Other features include a roof and battlements for sniping, a middle bunker for ducking down in, and a roomy flag room, great for sentry guns.
Locations
Respawn
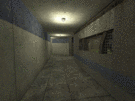
This is where you respawn. Both respawns have two routes; one leads to the base and the other leads to a platform for concjumping to the enemy's base. However, one of them has a hole that leads to the Flag Room Water Route. The backpacks in this room contain 200 Cells, 25 Rockets, 200 Shells, 200 Nails, 100 Health and 200 Armour. There is, of course, the obligatory spawnguarding indestructible turret to keep your spawn area free of Pyros or perhaps the occasional EMP-happy Engineer.
|
|
|
|
Ramp Room
|
|
|
|
Battlements
|
|
|
|
Loft
The backpacks in this room contain 60 Cells, 60 Rockets, 60 Shells, 60 Nails, 1 Regular and Special grenade, 20 Health and 15 Armour.
|
|
|
|
Flag Room Catwalks
|
|
|
|
Flag Room
|
|
|
|
Lower Flag Room
|
|
|
|
Flag Room Water
|
|
|
|
Water Route
|
|
|
|
Bunker
|
|
|
|
Yard
|
|
|
|
Front Door
|
|
|
|
|
