|
|
| Line 86: |
Line 86: |
| | {{Image_Gallery | | {{Image_Gallery |
| | | igimage1=[[Image:ff_well0074.gif|135px]] | | | igimage1=[[Image:ff_well0074.gif|135px]] |
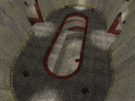
| − | | igcaption1=The arena. | + | | igcaption1=The grate. Notice the detpack near it, ready to blow the grate up. |
| | | igimage2=[[Image:ff_well0076.gif|135px]] | | | igimage2=[[Image:ff_well0076.gif|135px]] |
| − | | igcaption2=The arena. | + | | igcaption2=The grate after being blown up. |
| | }} | | }} |
| | | | |
The WIP page is below this.
 |
This is a stub map page and needs proper content. In the meantime the map loading screen is being displayed as a placeholder. |
Description
Ah, yes. The classic map, a map that defines Team Fortress: Well. Well is a symmetrical capture-the-flag level that consists of three main parts: the Blue base, the Red base, and the very large yard in between the bases. The bases can be entered through a water route (with a little help from Mister Detpack), or you can bull-rush the front door. Other features include a roof and battlements for sniping, a middle bunker for ducking down in, and a roomy flag room, great for sentry guns.
Locations
This is where you respawn. Both respawns have two routes; one leads to the base and the other leads to a platform for concjumping to the enemy's base. However, one of them has a hole that leads to the Flag Room Water Route. The backpacks in this room contain 200 Cells, 25 Rockets, 200 Shells, 200 Nails, 100 Health and 200 Armour. There is, of course, the obligatory spawnguarding indestructible turret to keep your spawn area free of Pyros or perhaps the occasional EMP-happy Engineer.
|
|
|
| Respawn with water entrance.
|
|
|
|
|
|
| Respawn without water entrance.
|
|
|
|
|
|
| The Conc Exit.
|
|
|
|
|

|
| The Conc Exit seen from inside.
|
|
|
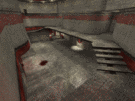
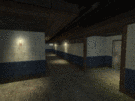
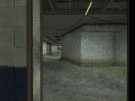
This is the main room in your base. On the bottom level, there are routes that lead to the front door, the Lower Flag Room and respawn rooms. The upper portion leads to the Battlements. It's relatively tight and directly accesses almost every area in the base.
|
|
|
| Overview of the Ramp Room.
|
|
|
|
|
|
| Shot of the entrance to the Lower Flag Room.
|
|
|
|
|
This is the main Sniper post, accessed from the upper Ramp Room. Its back has an elevator that leads to the Loft. You will want to steer clear of this little window if you are in the Yard.
|
|
|
| Overview of the Battlements.
|
|
|
|
|
|
| Alternate shot showing entrance to the Loft.
|
|
|
|
|
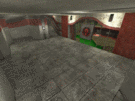
This is a area directly above the Ramp Room that has four backpacks, a hole leading to the Ramp Room and an elevator. This is the main resupply room for Engineers building in the Flag Room. The backpacks contain 60 Cells, 60 Rockets, 60 Shells, 60 Nails, 1 Regular and Special grenade, 20 Health and 15 Armour. Spies also like to hide here, waiting for an opportune moment to sabotage all of the hard-working Engie's sentry guns.
|
|
|
| The Loft has a ton of backpacks for Engineers.
|
|
|
|
|
|
These are catwalks placed on the upper side of the Flag Room area. These lead to the Flag Room. Usually sentry guns will be placed here, or in the Water Route on the bottom level.
|
|
|
| Overview of the entire Flag Room area. Notice the catwalks on the sides.
|
|
|
|
|
|
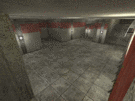
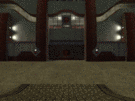
This is a circular room that contains the flag and a button that will open a barred, large window. The window has a hole in it that, if you crouch, can squeeze through, but if you press the button as you exit the flag room, the bars will recede fully and you can simply jump through. Watch out for Dispensers that will be sure to block this way.
|
|
|
| The actual Flag Room.
|
|
|
|
|
|
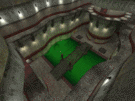
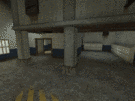
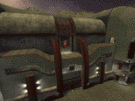
This area contains the Cap Point (inside the silo), elevators leading to the Flag Room Catwalks, an exit to the Ramp Room, and the Flag Room Water. There is a bridge over the water, from which anyone coming in through the water route will emerge. Two entrances lead in from the ramp room, on the other side of the bridge, opposite from the elevators.
|
|
|
| Overview of the lower Flag Room.
|
|
|
|
|
|
| Temp.
|
|
|
|
|
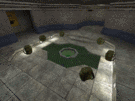
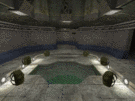
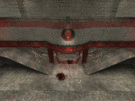
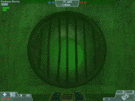
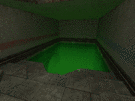
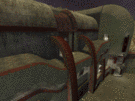
Flag Room Water
One route leads to the Water Route, while the other leads to the one of the Respawn rooms. The bridge is overhead.
|
|

|
| The arena.
|
|
|
|
|
|
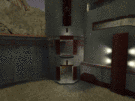
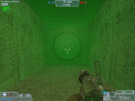
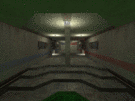
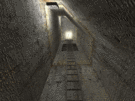
Water Route
A route leading from the Yard to the Flag Room Water. It's entrance in the Yard Canal is usually blocked by a grate, but it can be destroyed with a Detpack.
|
|
|
| The grate. Notice the detpack near it, ready to blow the grate up.
|
|
|
|
|
|
| The grate after being blown up.
|
|
|
|
|
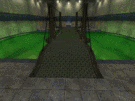
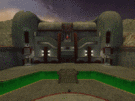
Yard Canal
This area are the moats in front of each base. These lead to the Yard or Bunker.
|
|
|
| The arena.
|
|
|
|
|
|
|
| The arena.
|
|
|
|
|
|
| The arena.
|
|
|
|
|

|
| The arena.
|
|
|
This is a bunker for sniping the enemy near his base. On each end are entrances to the Yard Canal, and the sides have entrances leading to the Yard. Spies will hide here, and Medics will probably have fun infecting anyone who runs by with their medkits.
|
|

|
| The arena.
|
|
|
|
|
|
| The arena.
|
|
|
|
|
|
| The arena.
|
|
|
|
|
|
| The arena.
|
|
|
This is the big yard in front of the bases. The sides of the bases have a ladders (which are covered from enemy fire, unless you are unfortunate enough to have a Demoman shoot grenades down at you as you climb) leading to the roof; an excellent sniping position.
|
|
|
| The arena.
|
|
|
|
|
|
| The arena.
|
|
|
|
|
|
| The arena.
|
|
|
|
|
|
| The arena.
|
|
|
This must be opened by hitting the buttons on the side of it. Expect heavy resistance inside.
Leads directly into the ramp room, with both Respawns flanking the route there.
|
|
|
| The arena.
|
|
|
|
|

|
| The arena.
|
|
|
|
|


