The WIP page is below this.
 |
This is a stub map page and needs proper content. In the meantime the map loading screen is being displayed as a placeholder. |
Description
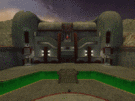
Ah, yes. The classic map, a map that defines Team Fortress: Well. Well is a symmetrical capture-the-flag level that consists of three main parts: the Blue base, the Red base, and the very large yard in between the bases. The bases can be entered through a water route (with a little help from Mister Detpack), or you can bull-rush the front door. Other features include a roof and battlements for sniping, a middle bunker for ducking down in, and a roomy flag room, great for sentry guns.
Locations
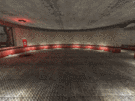
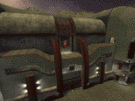
This is where you respawn. Both respawns have two routes; one leads to the base and the other leads to a platform for concjumping to the enemy's base. However, one of them has a hole that leads to the Flag Room Water Route. The backpacks in this room contain 200 Cells, 25 Rockets, 200 Shells, 200 Nails, 100 Health and 200 Armour. There is, of course, the obligatory spawnguarding indestructible turret to keep your spawn area free of Pyros or perhaps the occasional EMP-happy Engineer.
|
|
|
| Respawn with water entrance.
|
|
|
|
|
|
| Respawn without water entrance.
|
|
|
|
|
|
| The Conc Exit.
|
|
|
|
|

|
| The Conc Exit seen from inside.
|
|
|
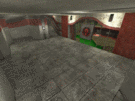
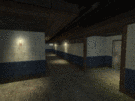
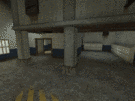
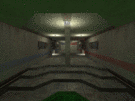
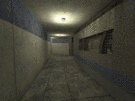
This is the main room in your base. On the bottom level, there are routes that lead to the front door, the Lower Flag Room and respawn rooms. The upper portion leads to the Battlements. It's relatively tight and directly accesses almost every area in the base.
Attackers should bypass the area ASAP. The tight corridors right before it make it very easy to get killed with a Pipe Trap or a few Rockets. Defenders usually expect you to go directly to the flag room. To trick them, head up to the Battlements and go to the Flag Room from there. Doing so won't make you have to use the dangerous elevator that's in the Flag Room to get the flag and bypasses a lot of defenders on the lower levels.
Defenders should focus on setting traps in the tight corridors near the respawn rooms. A Pipe Trap in the halls can take out most attackers with ease. The main room can be covered with a Sentry near the ramps or near the Battlement entrance, along with a Solider to cover blindspots.
|
|
|
| Overview of the Ramp Room.
|
|
|
|
|
|
| Shot of the entrance to the Lower Flag Room.
|
|
|
|
|
This is the main Sniper post, accessed from the upper Ramp Room. Its back has an elevator that leads to the Loft. You will want to steer clear of this little window if you are in the Yard.
Attackers can go through this area to bypass defense on the lower level and take out enemy Snipers.
Defenders can use this area as an excellent sniping perch. It allows you to see the enemy's Yard, and is somewhat difficult to attack from the enemy's side. Attackers occasionally come by here, so be ready to fight one off with the Auto Rifle.
|
|
|
| Overview of the Battlements.
|
|
|
|
|
|
| Alternate shot showing entrance to the Loft.
|
|
|
|
|
This is a area directly above the Ramp Room that has four backpacks, a hole leading to the Ramp Room and an elevator. This is the main resupply room for Engineers building in the Flag Room. The backpacks contain 60 Cells, 60 Rockets, 60 Shells, 60 Nails, 1 Regular and Special grenade, 20 Health and 15 Armour. Spies also like to hide here, waiting for an opportune moment to sabotage all of the hard-working Engie's sentry guns.
|
|
|
| The Loft has a ton of backpacks for Engineers.
|
|
|
|
|
|
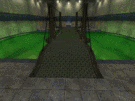
These are catwalks placed on the upper side of the Flag Room area. These lead to the Flag Room. Usually sentry guns will be placed here, or in the Water Route on the bottom level.
Attackers can bypass the area with special jumping techniques, such as concjumping. No matter what angle you view the area at, check it for Sentries. You're usually too far away from one at entrances, so if you find one, destroy it with a long-range and accurate weapon, like the Rocket Launcher or Nailgun. Once they're down, go to the Flag Room.
|
|
|
| Overview of the entire Flag Room area. Notice the catwalks on the sides.
|
|
|
|
|
|
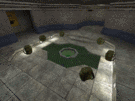
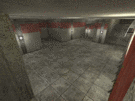
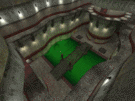
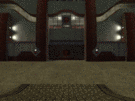
This is a circular room that contains the flag and a button that will open a barred, large window. The window has a hole in it that, if you crouch, can squeeze through, but if you press the button as you exit the flag room, the bars will recede fully and you can simply jump through. Watch out for Dispensers that will be sure to block this way.
Attackers should destroy any Dispensers they see blocking the way. Touching one will tell an Engineer that an enemy is near the flag, causing them to warn their teammates and/or blow up the Dispenser in the attacker's face. Before an attacker enters the room, he should toss two Frag Grenades on the opposite ends of the room. Engineers like to hide their Sentries on the sides of the room. Spies can sabotage them, which saves a Frag Grenade or two. Once an attacker has the flag, he should throw it out the window immediately (C key by default). Doing so will usually cause the flag to end up on the lower level, making it much easier for other attackers to come in and grab it before defenders can set up shop.
Defenders should have Engineers place Sentries on the sides and a Dispenser in front or on the sides of the entrance. The Sentries can catch enemies off-guard, and the Dispenser can let you know if an enemy is near the flag if he touches or destroys it. A HWGuy can do a ton of damage in the room, since it's so small.
|
|
|
| The actual Flag Room.
|
|
|
|
|
|
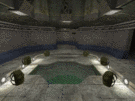
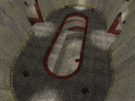
This area contains the Cap Point (inside the silo), elevators leading to the Flag Room Catwalks, an exit to the Ramp Room, and the Flag Room Water. There is a bridge over the water, from which anyone coming in through the water route will emerge. Two entrances lead in from the ramp room, on the other side of the bridge, opposite from the elevators.
|
|
|
| Overview of the lower Flag Room.
|
|
|
|
|
|
| Temp.
|
|
|
|
|
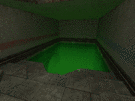
Flag Room Water
One route leads to the Water Route, while the other leads to the one of the Respawn rooms. The bridge is overhead.
Attacker will come out here at the end of the Water Route. Take a left as soon as you come in here, and you'll be in front of the elevators leading to the Flag Room.
Defenders shouldn't worry about this location, as the elevators that the attackers need to use are just outside the Water Route exit. That means a defender has a very small window to kill an attacker before he gets onto the elevator. It's better to intercept them at the Catwalks or the Flag Room itself.
|
|

|
| The arena.
|
|
|
|
|
|
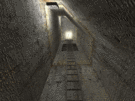
Water Route
A route leading from the Yard to the Flag Room Water. It's entrance in the Yard Canal is usually blocked by a grate, but it can be destroyed with a Detpack.
Attackers should destroy the grate ASAP. It provides a very important alternate entrance into the enemy's base, which causes them to stretch their defenders, especially if there aren't a lot of them. This is a great location for Spies to disguise, as it's length and the water makes it difficult to see anybody that's not directly in front of you.
Defenders should have a HWGuy posted near it as soon as the match starts, so that the enemy will be denied access to the Water Route as long as possible. A HWGuy won't have to worry a lot about his spread,as he'll always hit something because of how tight the Yard Canal is. The Assault Cannon can tear Demomen to pieces in a matter of moments, due to their mediocre amrour.
When the grate is blown up, defenders should have a HWGuy in the water, as the tightness of the route negates the large spread of the Assault Cannon.
|
|
|
| The grate. Notice the detpack near it, ready to blow the grate up.
|
|
|
|
|
|
| The grate after being blown up.
|
|
|
|
|
Yard Canal
This area are the moats in front of each base. These lead to the Yard or Bunker.
|
|
|
| The arena.
|
|
|
|
|
|
|
| The arena.
|
|
|
|
|
This is a bunker for sniping the enemy near his base. On each end are entrances to the Yard Canal, and the sides have entrances leading to the Yard. Spies will hide here, and Medics will probably have fun infecting anyone who runs by with their medkits.
Attackers should bypass this area via a jumping skill (if they can). Spies and slow classes should go in through the right door on their team's side of the bunker, then go through the water access to enter the base. Snipers can go the enemy's side and snipe enemies from there. This gives them a much better chance at scoring headshots than the Battlements would, as the enemy's heads are much closer to them.
Defenders should keep and eye out on the water entrance leading to their Canal. Having a powerful class posted in the water can slow down or destroy attacker waves trying to enter their base via the Canal.
|
|

|
| Overview of the Bunker.
|
|
|
|
|
|
| The pools on the left and right sides of the Bunker.
|
|
|
|
|
|
| Shot of the Bunker from the water pools.
|
|
|
|
|
|
| The Bunker is an ideal place for harassing your enemy's outer defenses.
|
|
|
This is the big yard in front of the bases. The sides of the bases have a ladders (which are covered from enemy fire, unless you are unfortunate enough to have a Demoman shoot grenades down at you as you climb) leading to the roof; an excellent sniping position.
Attackers should get to the Front Door ASAP. Prolonged fights in the Yard can drain your health and armour like crazy. Sneaky Snipers can climb to the roof and snipe enemies from the top of their own base.
Defenders can use the Yard to intercept anybody trying to come into the base via the Front Door, but it's somewhat impractical. A Demoman can rain down Blue Grenades from the roof or a Pyro could set incoming enemies on fire, making them easy pickings for the guys inside. Generally, however, it's better to have defenders stationed behind the Front Door. Don't forget to have a Sniper stationed on the top of your roof, Sniping enemies from their Yard.
|
|
|
| Overview of the Yard.
|
|
|
|
|
|
| The roof of your base is a great place to snipe.
|
|
|
|
|
|
| Another shot of the roof.
|
|
|
|
|
|
| The ladder leading up to the roof.
|
|
|
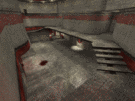
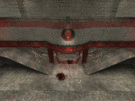
This must be opened by hitting the buttons on the side of it. Expect heavy resistance inside.
Leads directly into the ramp room, with both Respawns flanking the route there.
|
|
|
| The Front Door. It can only be opened by pressing one of the red buttons on it's sides.
|
|
|
|
|

|
| Just past the Front Door.
|
|
|
|
|


